What is a Mood Board and How to Create One in 3 simple steps
Discover how to gather inspiration, define your project’s aesthetic, and communicate your vision effectively.
share this!

In the world of art and design, a mood board is an essential tool that helps artists, designers, and creatives visualize their ideas and refine their concepts. It’s a powerful way to gather inspiration, define the aesthetic direction of a project, and communicate your vision to others. In this blog post, we’ll explore what a mood board is and provide a step-by-step guide on how to create one. By following these three simple steps, you can craft a mood board that will help you bring your creative projects to life.
What is a Mood Board?
A mood board is a visual representation of a concept or idea. It generally consists of a collage of images, colors, textures, and text that collectively convey the mood or theme of a project. Mood boards are used in various creative fields, including fashion, interior design, graphic design, and film, to name a few. They serve as a reference point and a source of inspiration, helping to keep the creative process focused and cohesive.
How to make an aesthetic Mood Board
STEP 1. Define Keywords and Subjects.
Firstly to create a mood board you need to define the keywords and subjects that will guide your visual exploration. This step sets a solid foundation for your mood board and helps you stay focused on the central themes of your project.
How to Define Keywords and Subjects:
- Identify Your Project Goals: Before starting, make sure to clarify the goals of your project. Make it explicitly. What are you trying to achieve? What message or feeling do you want to convey? Write down a few key points that summarize your objectives.
- Brainstorm Keywords: Based on your project goals, brainstorm a list of keywords that capture the essence of your project. Think about emotions, styles, colors, and themes that are relevant. For example, if you’re designing a cozy coffee shop, your keywords might include “warmth,” “rustic,” “comfort,” and “vintage.”
- Select Key Subjects: Alongside your keywords, identify specific subjects or elements that you want to include in your mood board. These could be related to your project’s setting, characters, materials, or any other relevant aspects.
STEP 2. Find and Collect Images.
Secondly, once you have a clear idea of your keywords and subjects, it’s time to find and collect images that reflect those concepts. This step involves gathering visual inspiration from various sources to create a rich and diverse pool of materials for your mood board.
How to Find and Collect Images:
- Use Online Resources: Search for images online using your keywords. Websites like Pinterest, Behance, and Instagram are excellent platforms for finding high-quality visuals. Create a dedicated folder or board to save the images you find.
- Explore Different Media: Don’t limit yourself to digital images. Explore magazines and books as well as other printed materials for unique and inspiring visuals. You can scan or photograph these images to include them in your digital mood board.
- Consider Diverse Sources: Gather images from a variety of sources to ensure a well-rounded mood board. E.g. Look for photographs, illustrations, textures, color palettes, and typography samples that align with your keywords and subjects.
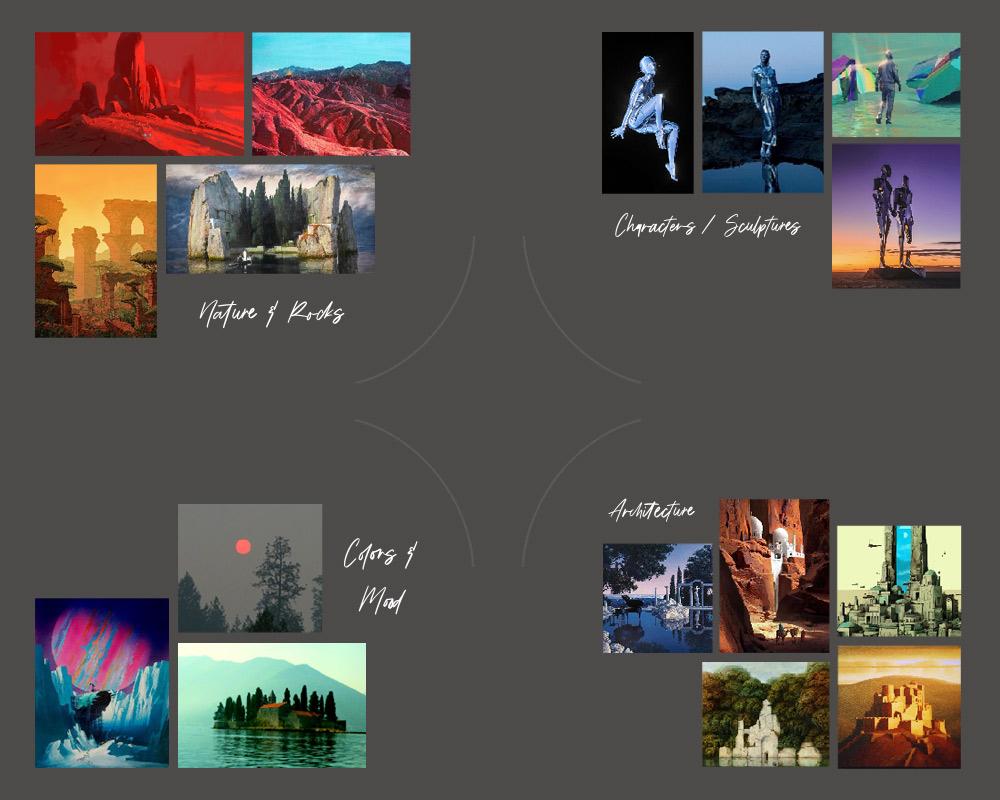
STEP 3. Organize and Assemble Your Mood Board.
Last, with a collection of images at hand, the final step is to organize and assemble your mood board. This step involves arranging your visuals in a way that clearly communicates the mood and direction of your project.
How to Organize and Assemble Your Mood Board:
- Choose a Format: Decide whether you want to create a physical or digital mood board. For digital mood boards, tools like Canva, Adobe Spark, and Milanote offer user-friendly interfaces for assembling your images. For physical mood boards, you can use a large poster board, corkboard, or even a sketchbook.
- Arrange Your Images: Start by placing your most important images in the center or at focal points on your board. Arrange the remaining images around them, paying attention to composition and balance. Group similar images together to create a cohesive look.
- Refine Your Board: Once your images are arranged, take a step back and review your mood board. Make any necessary adjustments to ensure that the overall composition is visually appealing and effectively conveys your intended mood. Add any final touches, such as notes or keywords, to enhance clarity.
In simple lines: creating a mood board is a valuable exercise for any creative project. It helps you visualize your ideas, refine your aesthetic direction, and communicate your vision clearly. By following these three simple steps, defining keywords and subjects, finding and collecting images, and organizing and assembling your mood board, you can craft a mood board that serves as a powerful tool in your creative process. Once your mood board is defined, you can further refine your investigation by paying attention to the colors, formats, and textures that you want to include in your project.
Happy creating!
Discover the power of art therapy for emotional healing, unlocking peace and self-discovery.